Lesson Activity – Diagnosing Problems in an Electrical Circuit
Lesson Activity - Diagnosing Problems in an Electrical Circuit
Your normal electrician instructor is out for the day. So, a new instructor from Wild Ted’s Discount Electrician’s Course is stepping in! Follow along as Wild Ted installs an LED with a switch and an outlet.
You may notice some things that are a bit unorthodox, but go ahead and follow Wild Ted’s instructions and/or circuit diagram (below)
Grab your screwdriver, wirecutter/stripper, a three-way switch, an LED, an outlet, two 10” lengths of 3-strand cable (one black sheath, yellow wire removed, and one brown sheath), and your WorkBench with Load Center. Follow along with the video to practice creating and troubleshooting the circuit!
Your goals:
Part 1:
- Cut two 10” pieces of 3-strand cable (one black, one brown)
- Prepare the cable by stripping the sheathing, stripping the wires, and preparing the cable as shown in Lesson 5
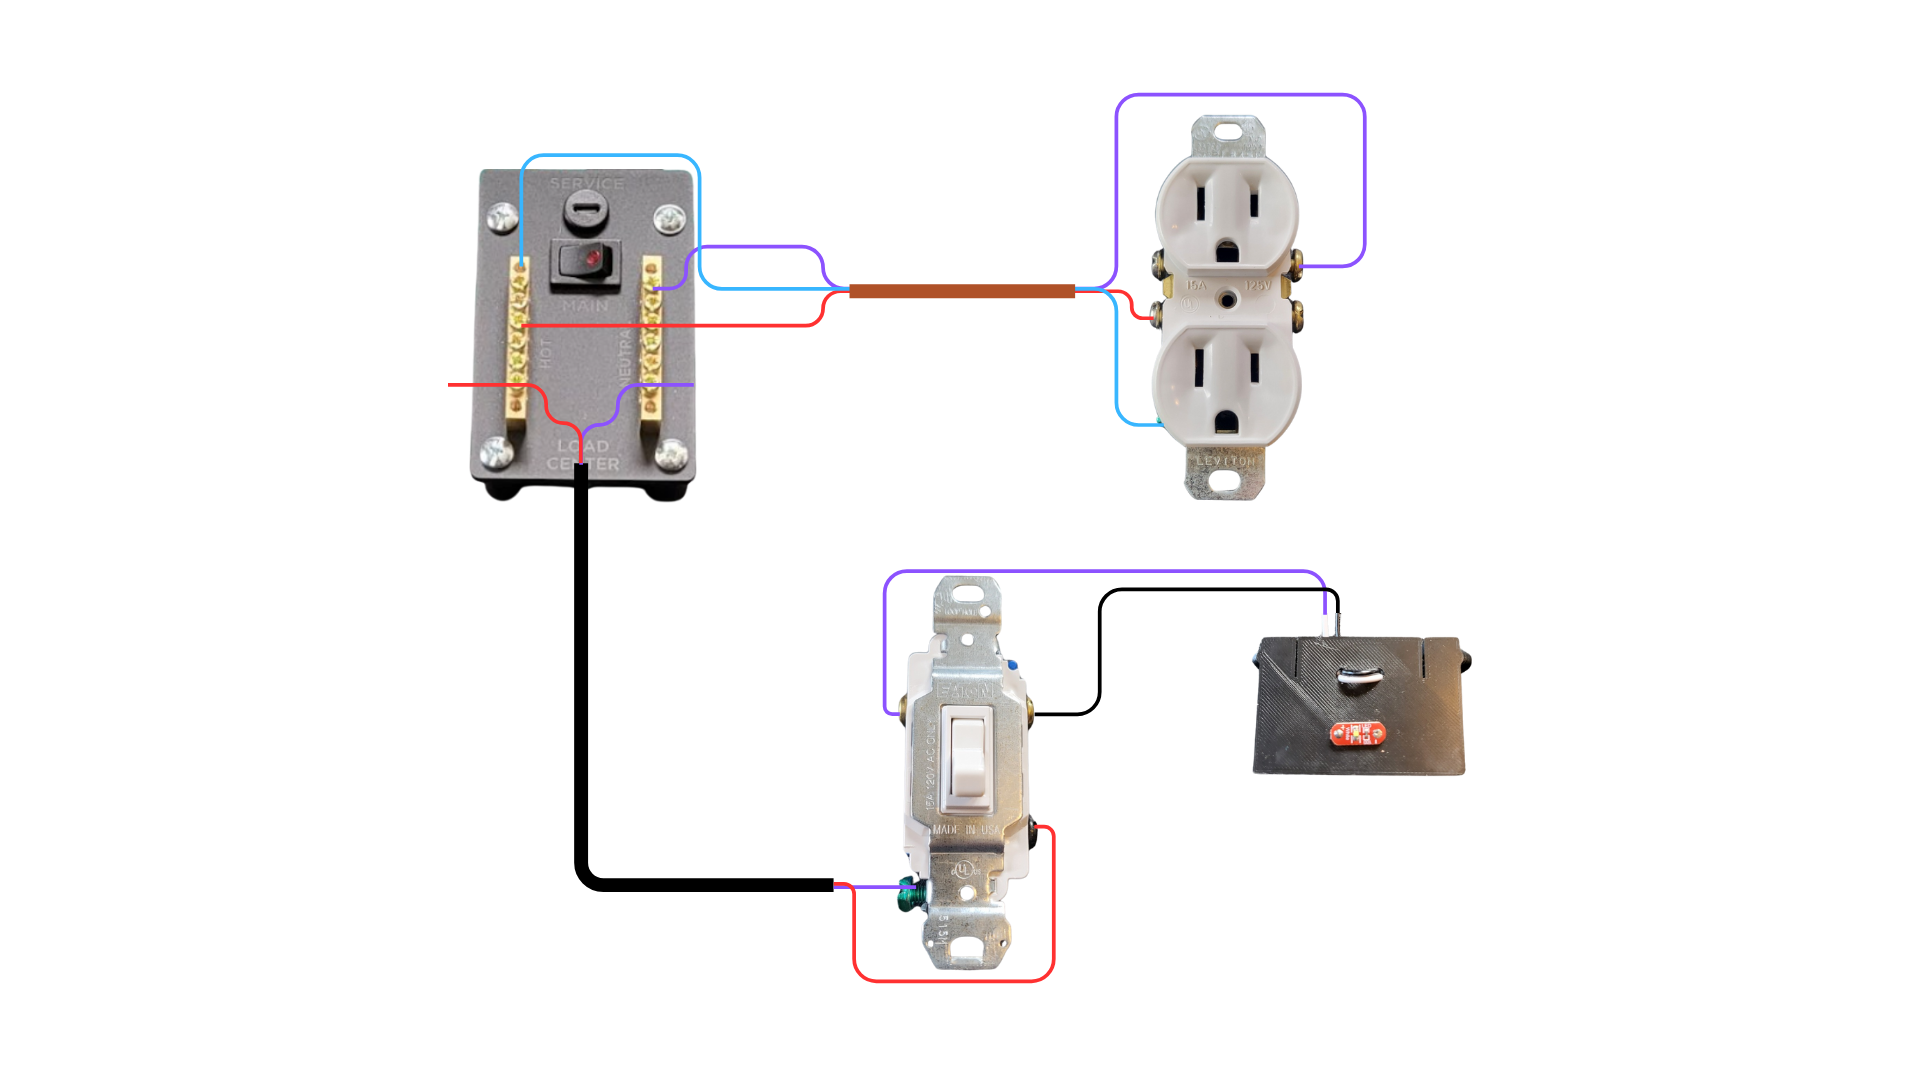
- Follow along with Wild Ted or the circuit diagram to connect the components
Wild Ted's Circuit Diagram
Part 2:
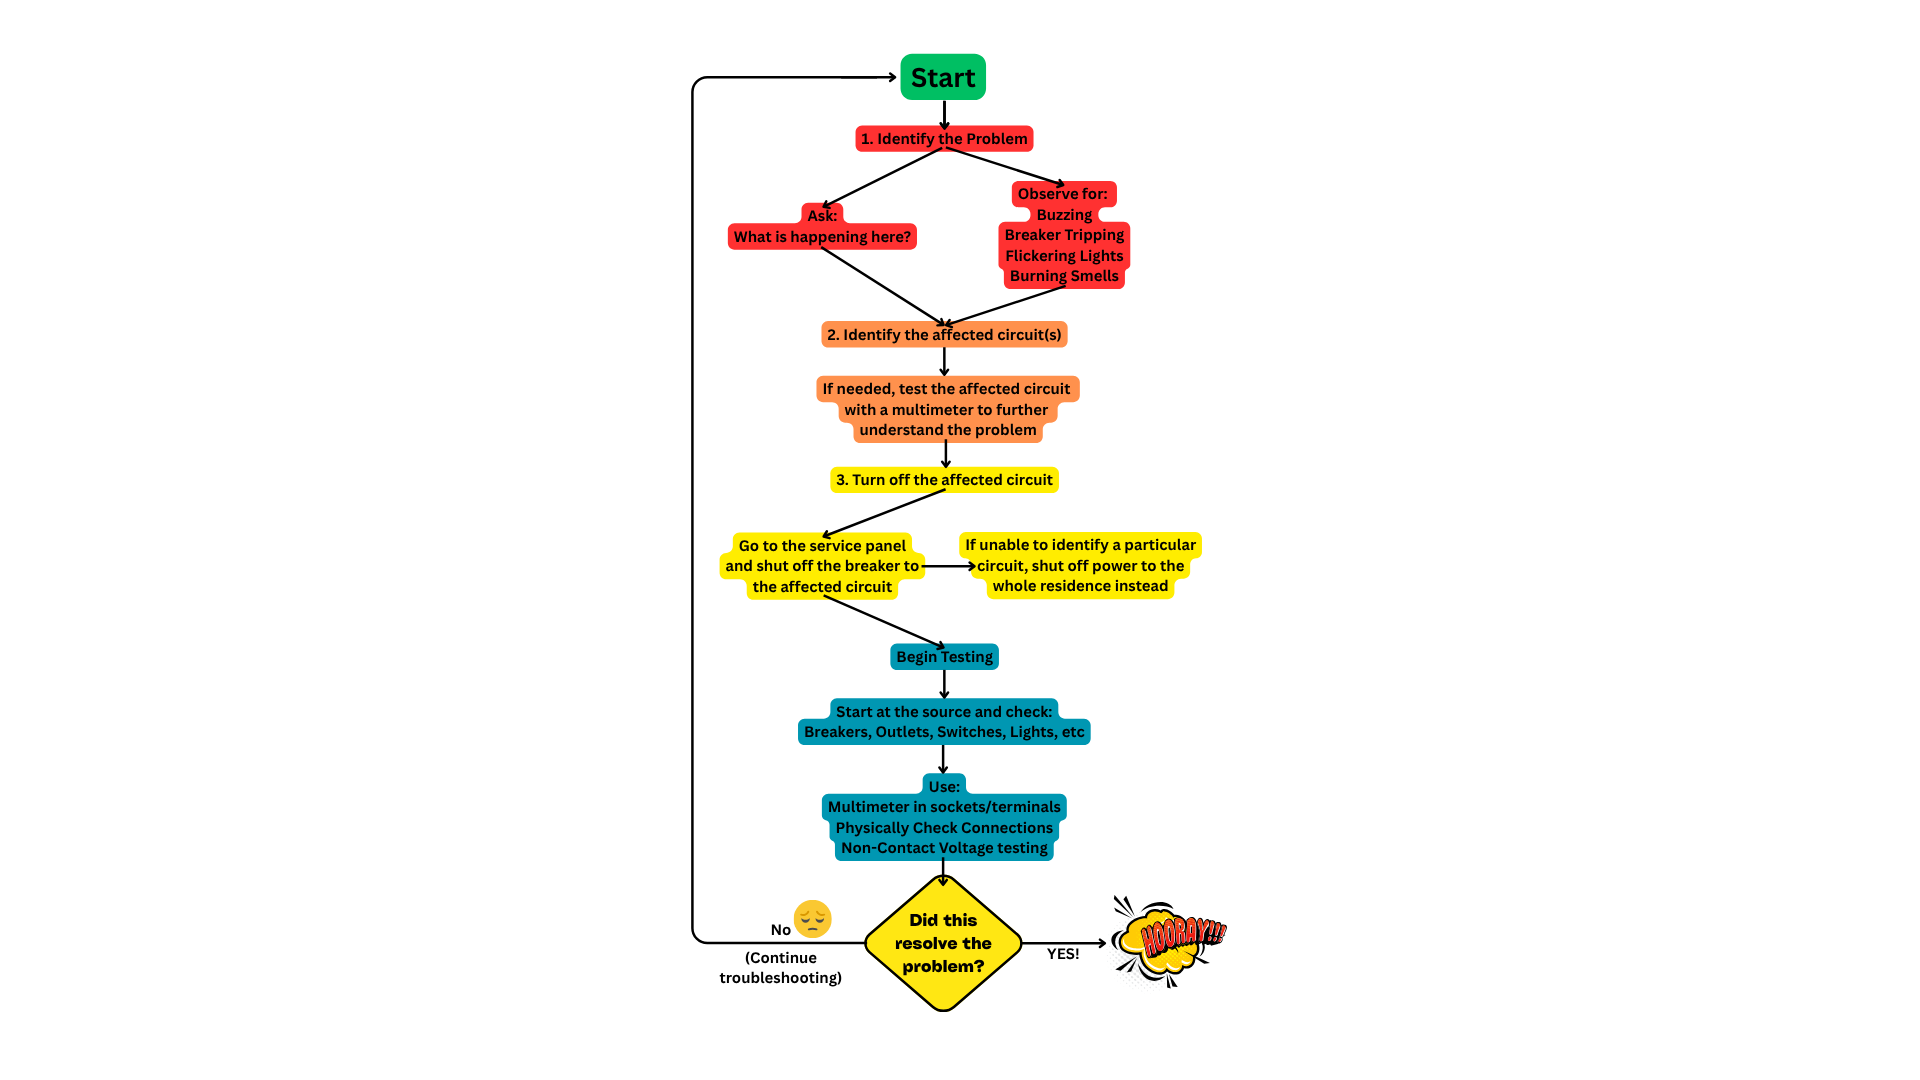
- After following the video/diagram to build the circuit, use the Step-by-Step Assessment of Electrical Issues flowchart (below) to safely identify and resolve the many issues left by Wild Ted.
- Ensure best practices in wiring (discussed in previous lessons) are used throughout
- Test circuit to ensure the LED can be controlled with the switch
- Use the multimeter to check for proper polarity and voltage on the outlet
- Draw a proper circuit diagram for the circuit
- Once you feel comfortable with these skills, remove all connections and cut your cable clean to prepare for the next lesson!