Lesson Activity – Wiring an Outlet, Single-Pole Switch, and an LED
Lesson Activity - Wiring an Outlet, Single-Pole Switch, and an LED!
Grab your screwdriver, wirecutter/stripper, digital multimeter, the outlet, a single-pole switch, an LED, a wire nut, two 10” lengths of 3-strand cable, and your WorkBench with Load Center. Follow along with the video to practice connecting the outlet, a switch, and an LED to a single circuit.
Your goal:
- Cut two 10” pieces of 3-strand cable
- Prepare the cable by stripping the sheathing, stripping the wires, and preparing the cable as shown in Lesson 5
- Connect the Hot and Neutral to the right and left screw terminals of the outlet, respectively
- Connect the cable to the Hot and Neutral of the Load Center
- Verify the continuity of the connection using the digital multimeter
- Turn on the Load Center and test the voltage in the outlet
- Follow along to create a circuit with one LED controlled by the switch
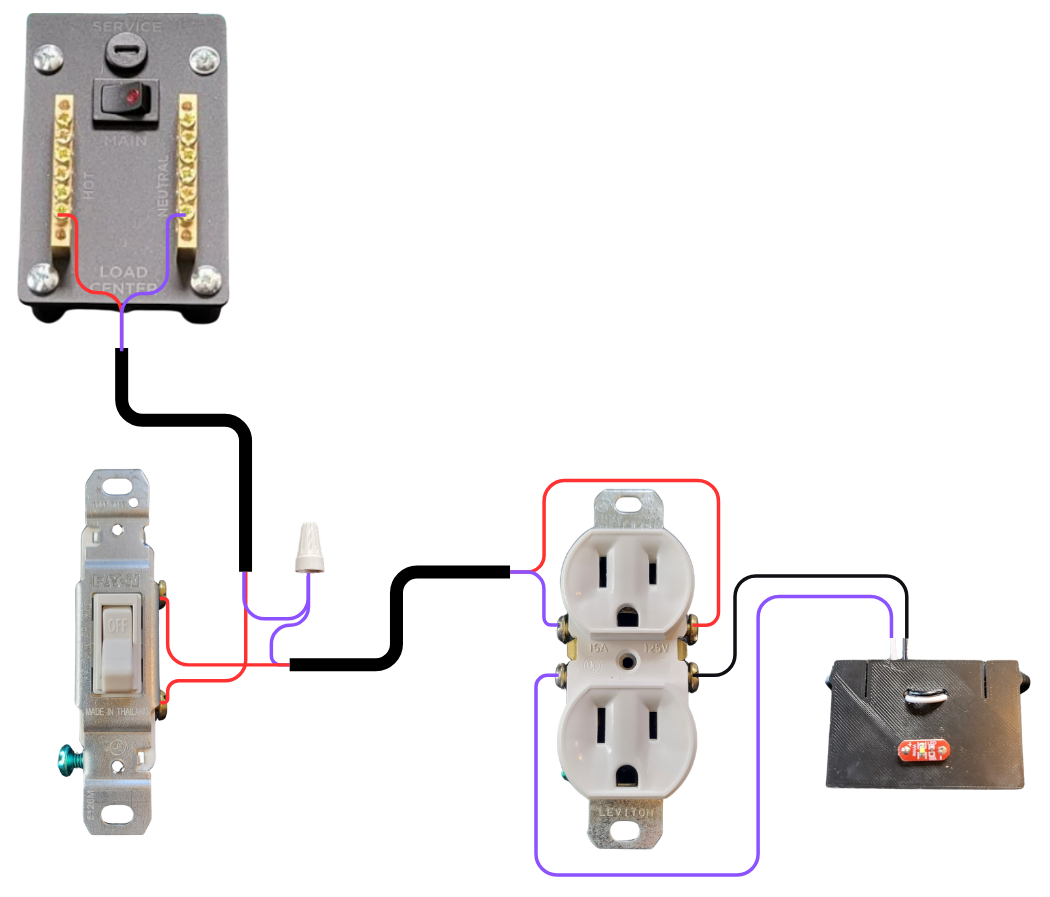
- Follow the circuit diagram (below) to rearrange the circuit so that the outlet is controlled by the switch, with the LED used as an indicator that the outlet has power.
- Once you feel comfortable with these skills, remove all connections and cut your cable clean to prepare for the next lesson!
