
A Step-by-Step Assessment of Electrical Issues
A Step-by-Step Assessment of Electrical Issues
In order to assess an electrical problem, it is best to do so in an orderly fashion. Haphazardly approaching an electrical issue may end up with a resolution of the problem, but it will likely cost more time and effort than following an orderly flowchart. Such a flowchart is located below!
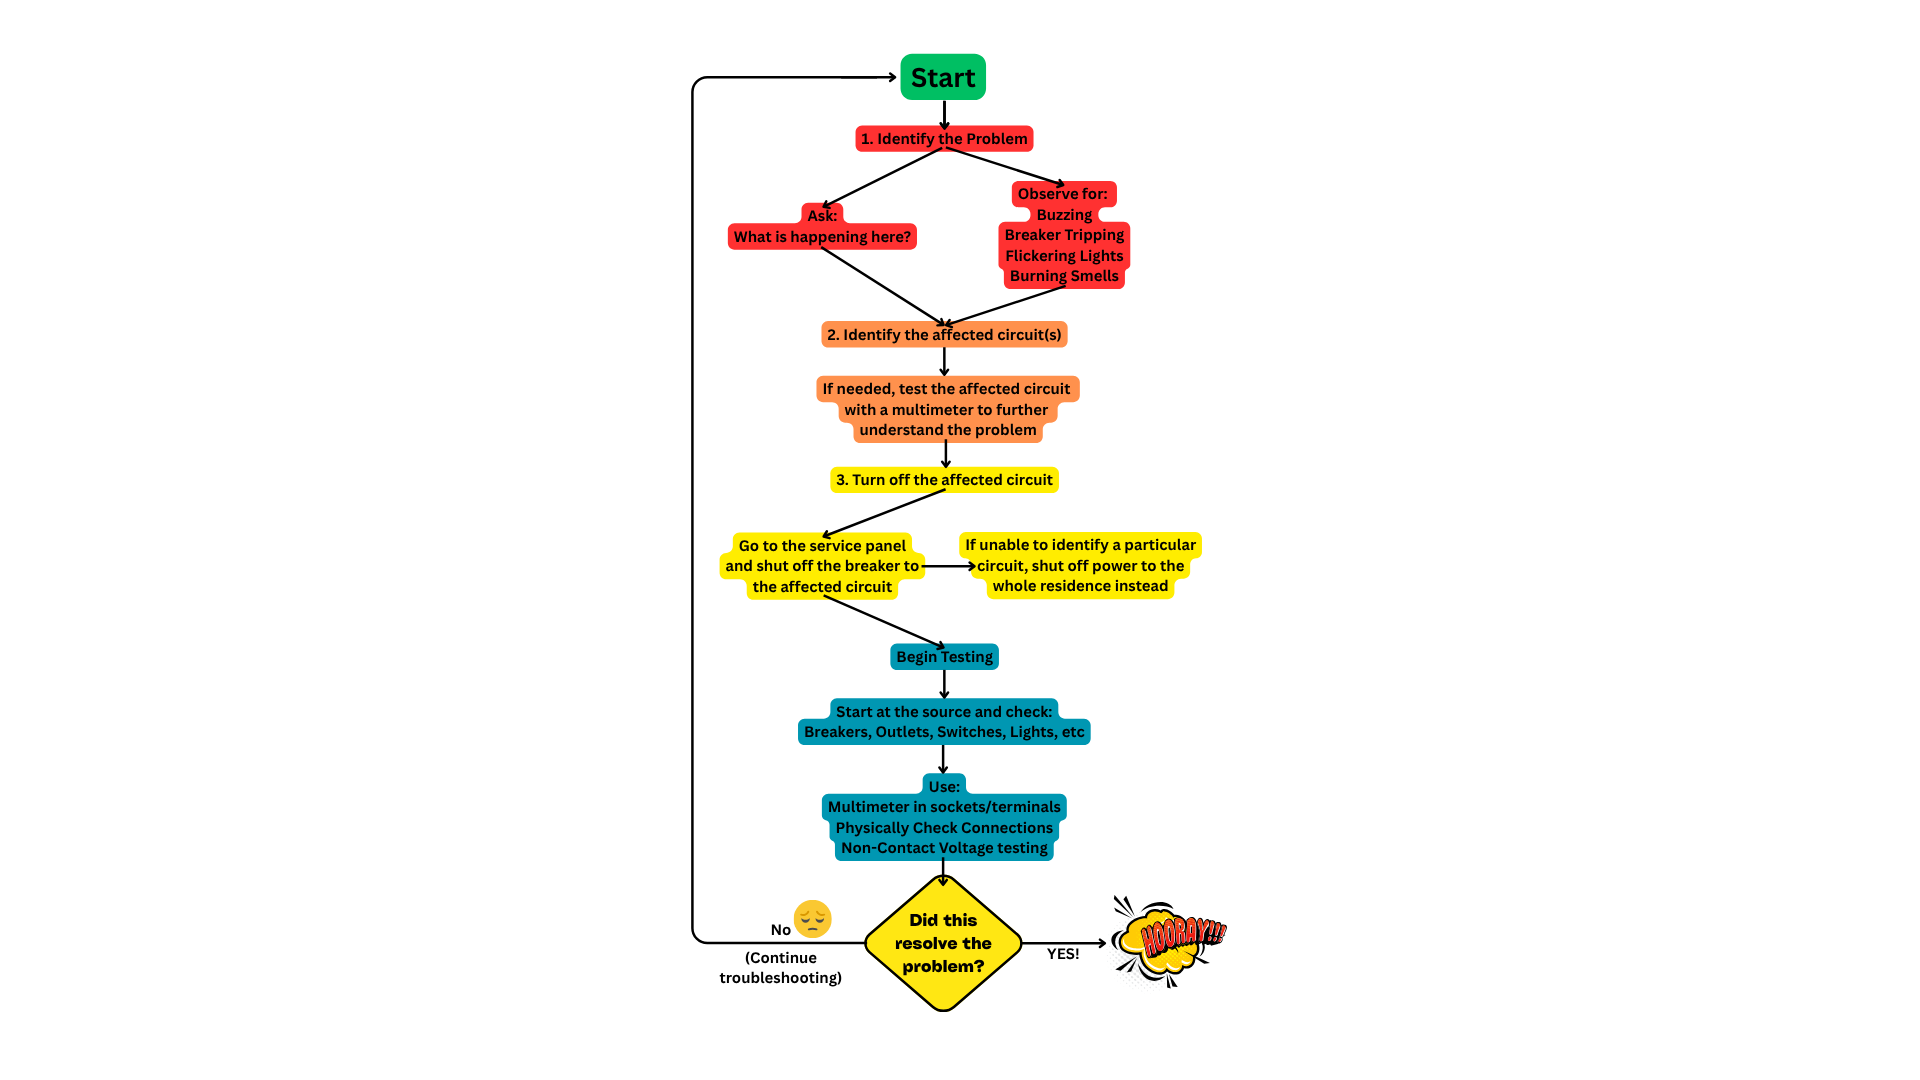
The chart begins by identifying the problem. The main question is to ask, “What is happening here?” Then, observe the affected areas. Do you hear buzzing from the circuits? Do you see breakers tripping or flickering lights? Do you smell burning plastic or other non-natural smells? These can be signs of significant issues and can help inform you as to what is happening.
The second step is to identify the affected circuit or circuits. This may be obvious if a specific circuit breaker is tripped. Using a multimeter and testing multiple outlets or light sockets in the affected room or rooms can help provide information about the problem.
The third step is to turn off the affected circuits. If it is impossible to identify the circuit in question, it may be necessary to turn off the power to the whole house to safely address the issue. This is also a good reason to clearly (and legibly) label each circuit when installing new circuits in a service panel.
The fourth step is to thoroughly test and inspect the circuit(s) in question. Since circuits stem from the service panel, it is best to check the service panel and move further away from the panel to the affected circuit. Before touching any wires, check for voltage! Often, electrical wiring is grandfathered in or, in other words, not up to current code. Additionally, if your homeowner or ‘handyman electrician’ did any work on the circuit, there may be surprises in store if you do not test before you touch. Use your multimeter in outlets and sockets, physically check components for proper connections (and any damage they may have), and you can use your Non-Contact Voltage tester (discussed in the next section) to help look for live current.
After going through the flowchart, you may have identified components to replace, wires to redirect, or other issues. Once these are resolved, you can turn the breaker to the circuit on. If it doesn’t trip, systematically check each outlet, switch, and light on that circuit to ensure functionality. If it all works, then you have resolved the issue! If the issue persists or another one arises, start back at the top of the flowchart and begin troubleshooting again!